Getting Started with the CLI
Install the Slack Green CLI on your laptop or a remote VPS. Runs as a background daemon — no browser needed.
You can run the CLI on your personal laptop or on a remote VPS (e.g. a $5/mo server). If you'd rather skip self-hosting entirely, we also offer lifetime access to our hosted plan.
Install the CLI
Run this in your terminal (macOS / Linux):
curl -fsSL https://slack.green/install.sh | bashRequires Python 3.11+. The script installs sg-cli via pip and adds it to your PATH. Re-run anytime to update.
Don't have Python? Install it first: macOS — brew install python · Ubuntu/Debian — sudo apt install python3 python3-venv · Fedora — sudo dnf install python3
VPS (remote server): SSH into your server and run the same command above.
Launch the CLI
Open your terminal and run:
sg-cliThat's the only command you need to remember. Everything else happens inside the interactive TUI (terminal UI).
The CLI automatically starts a background daemon — a lightweight process that keeps your Slack status active. You can close the terminal and it keeps running.
Laptop vs VPS: On a VPS, the daemon keeps running even after you disconnect — you set it up once and forget about it. On your laptop, it stops when you shut down, so you'll need to run sg-cli again after rebooting. Not a big deal, but if that sounds annoying, we also sell a hosted cloud plan (also lifetime) that just works without running anything.
Activate your license
The CLI is a one-time purchase of $45.99 — no subscription. Head to Dashboard → Billing and grab the lifetime license.
Your license key (SG-XXXX-XXXX-XXXX-XXXX) will show up on your CLI dashboard.
On first launch, the CLI asks for your license key. Paste it in, hit Enter, and you're activated.
Shutdown guarantee: If Slack Green ever shuts down, we will release an DRM-free version of the CLI that works without license activation. Your purchase is permanent — you'll never lose access.
Add a workspace
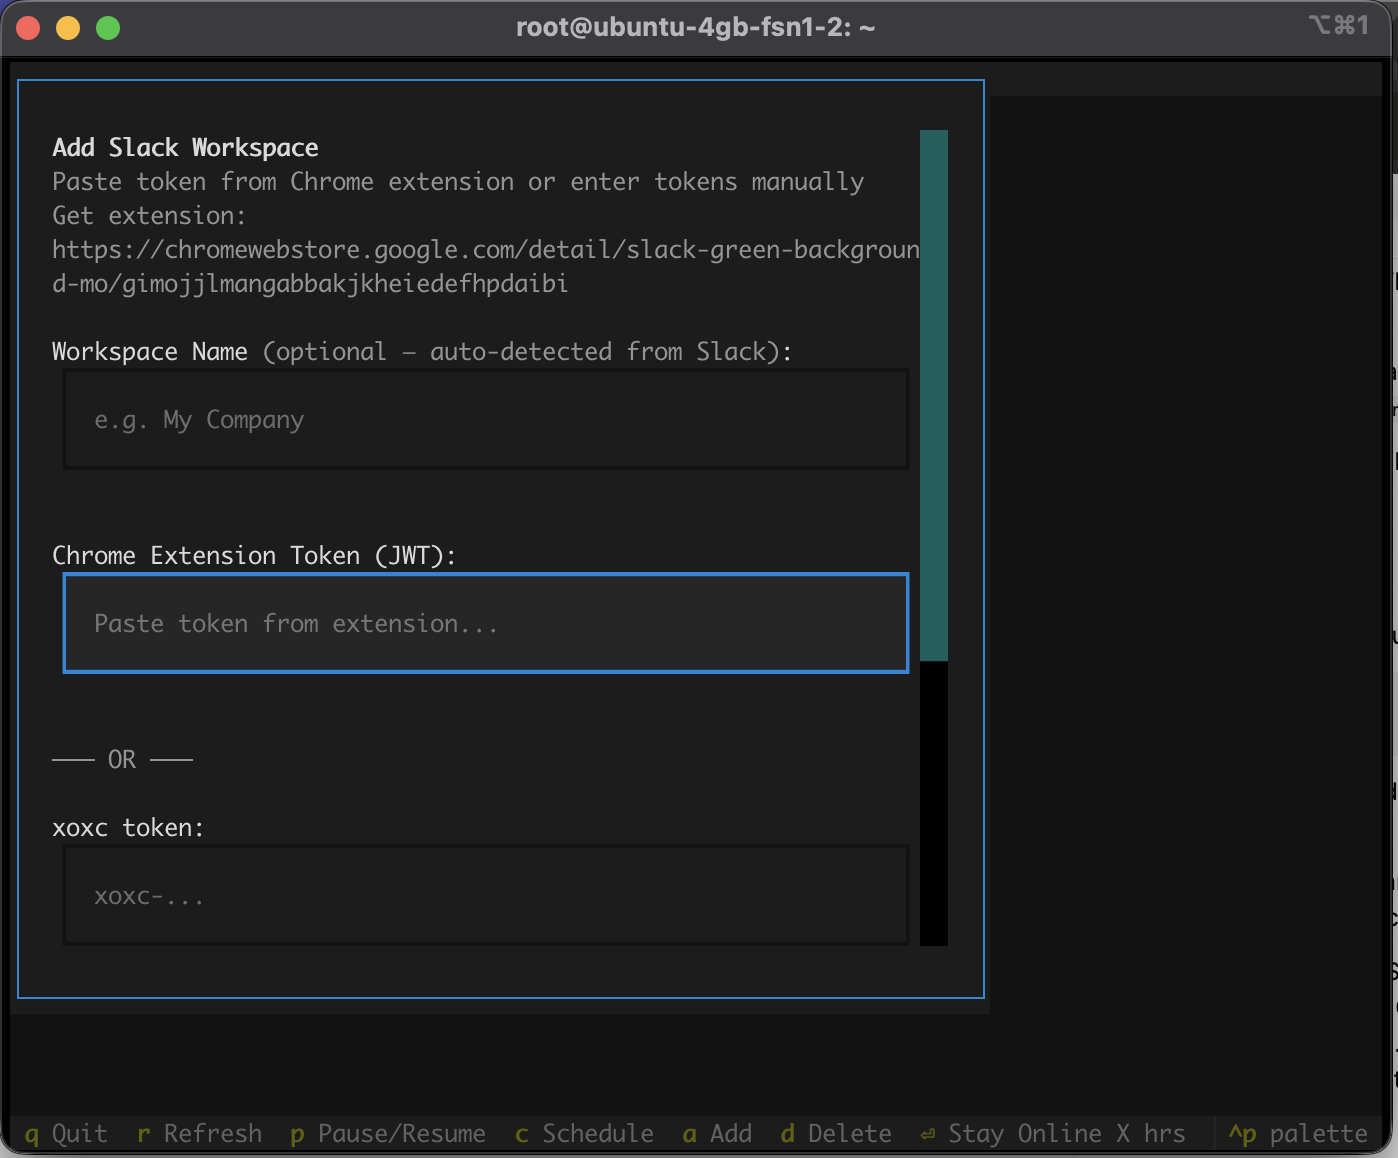
Press a in the TUI to add a workspace. You'll see a modal with two options:
- Chrome Extension Token — paste the JWT from the Chrome extension. Recommended because it auto-fills both tokens. (guide)
- Manual tokens — paste your
xoxcandxoxdtokens separately. (guide)
The CLI verifies the tokens with Slack, then opens a schedule editor for the new workspace.
Your Slack workspace data (messages, channels, members) never touches our servers. The only data sent for license validation is your license key and device ID. Tokens are stored locally in ~/.sg-cli/workspaces.enc, encrypted with a machine-specific key.
Configure your schedule
After adding a workspace, the schedule editor pops up automatically. You can also open it later by selecting a workspace and pressing c.
- Press w for weekdays only, e for every day
- Type times like
9am,9:30, or14:00 - Click Always On to skip scheduling entirely
Outside scheduled hours, the daemon pauses the workspace automatically.
That's it — you're green
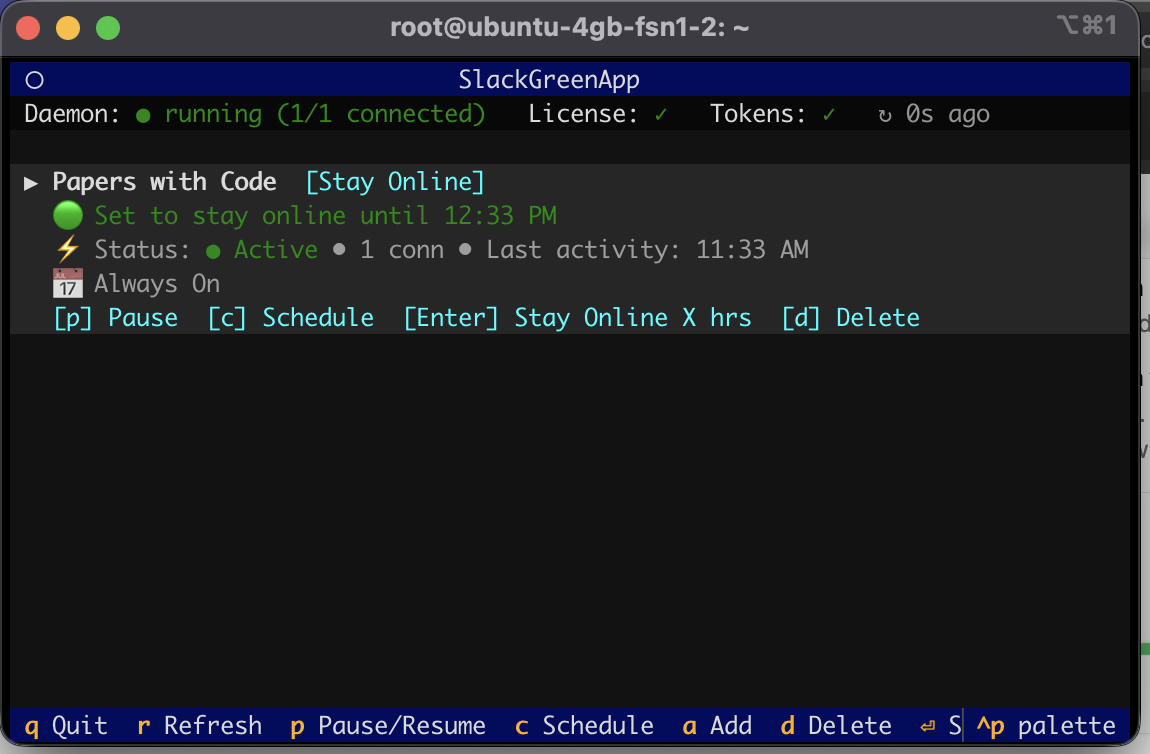
The TUI shows your workspaces, their presence status, and the daemon health. Here's what you can do from here:
| p | Pause or resume a workspace |
| Enter | Stay online for X hours (temporary override) |
| d | Remove a workspace |
| r | Force refresh |
| q | Quit the TUI (daemon keeps running) |
The daemon runs in the background — you can close the terminal tab and it keeps working.
Stop Jiggling Your Mouse.
Join hundreds of remote workers who never worry about their Slack status. Set it up once, stay green forever.